06 GameDesign

Environment Level

Assignment

The assignment for these weeks was really open regarding concept/theme and design. Creating a aesthetically pleasing and interesting game environment, using only your own resources. Modelling your own meshes and paint/create your own textures. Create a simple start menu, adding a start and a quit button.

Schedule

Week1

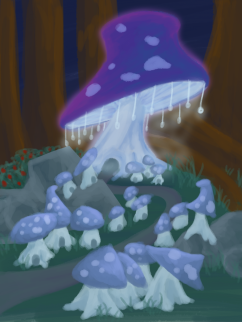
I spend the first week on thinking and drawing different kind of environments I would like to make. I came up with some ideas, but the ones I like the most was: a pirate cove with a beach and cave, mushroom village or a cold tundra with a sapmi lavo. I also had some ideas for some islands with farms or just houses. I knew I wanted painted textures, and that it would take time, so I needed to figure out what I wanted quick. So I made a quick mood board on how I wanted the mood and ideas to the mushrooms and colours I wanted.

Week2

After thinking a lot about what I wanted I settled for mushroom village, and started planning how I wanted the layout and what props I wanted to have in the village (as seen above). In the finished product I ended up cutting some things out cause of time restrictments. After I got down what I wanted I started making the different props in Maya.

mushroom environment

Week3

I used time to make the different houses, props, and the fences/tree that was going to fence the scene inn. I started with the big mushroom house and used the base of that to make the smaller mushrooms, and using same UVs for some of the small houses to spare time on the texturing. I also made windows and doors I could reuse to the rest of the props. I also tried to make most of the things as low poly as I could without it looking to square.

Week4

I used this week to texture. I used Photoshop to texture everything and used a standard paint brush like brush to get the painted feel I wanted. Painting the assets took really long time and I still had some assets that wasn’t totally done yet but I needed to start the texturing right away. I ended up making them later in the week and weekend, and ended up cutting out the second floor for the big mushroom, would just have taken too much time.

Week5

Monday to Wednesday went to finishing all the objects, textures and the collisions on all the objects. Witch was mostly the props inside the house, bed, bookcase and table with different props on. The rest of the week went to exporting all the objects to fbx and placing things in unreal engine. Since I painted the textures I didn’t want too much lighting effects. But I added a post processing volume to give the whole scene a purple colour. I also added emissive colour on the mushrooms to make them look like they glowed slightly. I made a quick and easy and simple looking start screen. With moving cameras, and I used Photoshop to make the texts and buttons. I also added some free music from the webside freesound (link to the song in the end).

Challenges

Some challenges I faced was to have time to texture everything by hand in Photoshop. I also had some challenges with the material on the table cloth in the mushroom house, whatever I did with the material it still lit up and made screen flares, maybe it just was because it was too white, but I didn’t have time to fix it.

Self-evaluation

I’m really pleased with some of the textures, but others you can see I didn’t have enough time to fix and use as much time on. In retrospect I should have chosen a smaller project if I wanted my first time project on hand painted textures, because it took so much of the time. So I didn’t have much time to fix it in unreal. And with some personal problems and family made it hard to make everything in time.


Links:

https://www.freesound.org/people/FoolBoyMedia/sounds/219017/

https://www.youtube.com/watch?v=1qaZ-eu6NRs


02 Content Creation01

This weeks assignment was to create a game asset, the theme for this assignment was “Viking weapon”, meaning the style and aesthetic should have Viking written all over it. Being based on Viking culture, design and traditions. Other than that the assignment was really open on what kind of weapon and what kind of style, stylized, simplistic or realistic.

-Mon 09:00-16:00: silhouettes, concept

-Tue 09:00-16:00: modelling

-Wed 09:00-16:00: texturing

-Thu 09:00-17:00: texturing, rendering

-Fri 10:00-17:00: report

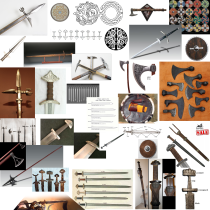
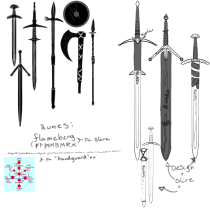
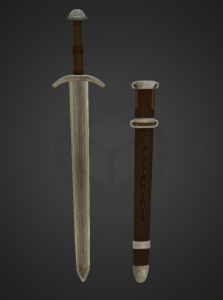
I started to look up what kind of weapons the Vikings used, and went from there. I wanted to make an axe, sword or a king of spear. I also thought about a pole hammer, but its not really an Viking weapon so I scratched that idea quick. I thought an axe would be to boring since most people in my class made an axe, so I decided I wanted to make a sword. I thought about a normal Viking sword, a great two handed sword and a middle sized sword. I wanted to make the sword semi realistic, so I made blade how it would look if it was smithed, with the tang/the pole going all the way into the handle.

I wanted some runes and decoration on the sword to make it more Viking. So I wrote “flameberg” with runes on the scabbard, flameberg is a name on one of my favourite swords, it’s a two handed sword with a wavy blade. On the hand guard I wrote all the different worlds in the Viking mythology: Asgard – Ljossalfheim – Midgard – Jötunheim – Myspellheim – Vanaheim – Niflheim – Svartelfheim – Helheim.

02_Moodboard_Gundersen_Caroline 02_Consept_Gundersen_Caroline

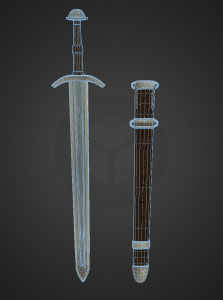
I used quad draw to make the general shape of the sword and added edge loops when I needed, I also extruded the faces on front of the sword to go in to make the fuller. Then I mirrored it and connected the sides with a simple bridge, also adding an edge in-between to make a hard edge on the sides. I did the same on the hand guard, I also used quad draw to make the pommel and shaping it into a dome and connecting it to the grip, which I made from a cylinder, extruding out the grip more to make bumbs on the grip so it would be easier to hold.

The scabbard I made by duplicating the blade and scaling it a little and cleaning up the edges and removing the fuller. I made the metal parts by extruding them out. The handles on the scabbard I made with a cylinder and bending it, I duplicated it after I had unwrapped it.

The leather straps on the scabbard I made by quad drawing it on the scabbard and moving it around so it would fit. When I got all the parts I started unwrapping them. I used mostly planar mapping, and fixing them after wards, since it was going to be just the same on both sides.

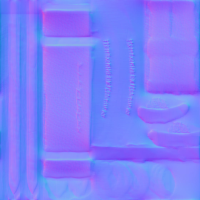
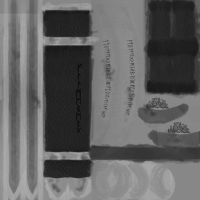
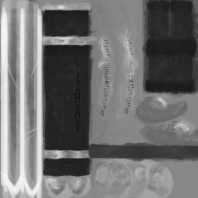
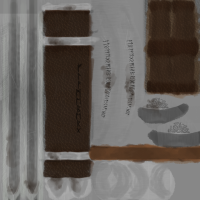
Since I wanted it semi realistic, I painted mostly everything in Photoshop, adding some metal and leather textures to add more detail. I used a rough round brush in Photoshop to draw the diffuse, adding dirt and light on the specular and reflections. I generated the normal map in crazy bump from my diffuse.

VikingSword_Normalmap VikingSword_reflection VikingSword_specular VikingSword_Base_color

I think it went pretty good, but what I would have done different, fixing more on the textures. And maybe loading the model into zbrush to make a better normal map and practice more on zbrush.

sketchfab link: https://sketchfab.com/models/d7dcbd935c134f45a8e719e1212c1279

02_BeautyRender_Gundersen_Caroline 02_WireframeRender_Gundersen_Caroline

Environment game consept

the first two weeks of 3D game design:

The first two weeks assignments was to make a concept document for a game environment. The assignment was quite open-ended and we were free to create any kind of universe. Don’t focusing gameplay or genres, the goal was to get started in the creative process and to imagine interesting worlds that could be used to create a game from.

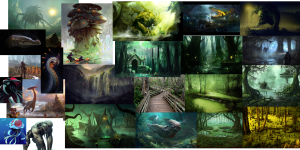
The first thing I did was to think about what kind of environment I wanted, was it going to be in the future, past, nature or a city. In the end I wanted to make a forest or swamp environment. So I searched online for some swamp/forest pictures for my mood board. I picked some more fantasy settings in my mood board, but my concept would be a sci fi world where the humans had left the earth. Also added some bigger creatures I was thinking about adding.

My general inspiration came from the games the last of us, cause of the cities overgrowing and water everywhere, and from dark souls 1 and the different forest and swamp locations. Like: ash lake, painted world of ariamis, darkroot garden, blighttown.

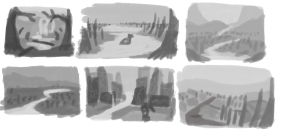
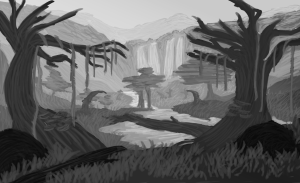
When I got the general feel of the kind of environment I wanted I started drawing some quick drawings and writing about the environment. I am not good at writing down stories, so the Concept document is quite short. I used photoshop to draw down some quick drawings in grey scale and after I choose the one I liked the most, I added more quick details to it.

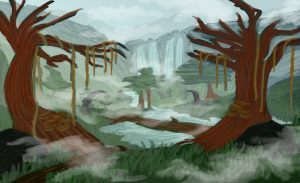
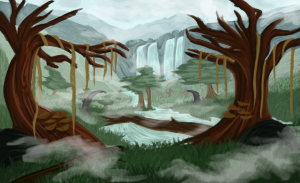
I drew most in grey scale and added color and smoke/fog afterwards. I’m not completely happy about the drawing, I would fine tune it more if I had the time and would go over again with some more color, shadows and highlights, and maybe add some wildlife. My challenges was to write down a story and write down my concept, I’m not good with writing my stories down, so I used more time on getting the drawings done than writing.

01_Moodboard_Gundersen_Caroline 01_ConceptArt_Gundersen_Caroline_01 01_ConceptArt_Gundersen_Caroline_02 01_ConceptArt_Gundersen_Caroline_0301_ConceptArt_Gundersen_Caroline_04

story:

in the future when humans have moved on and left the earth cause of pollutions, droughts and nuclear war.

After more than thousands of years and the earth is starting again to grow green. The nuclear gasses and other pollutions got socked into the ground and speed up the growing process. The earth now is peaceful with its animals who have adapted to live in this toxic paradise, but for other outer worldly being it can be quite toxic, for those who haven’t adapted to it.

Other species or humans are coming back to check and research the “new” earth. To check if the earth would ever be inhabitable for humans again. Humans monitor the earth with special claw looking towers placed around, checking the pollution in the soil, water and in the air, sending the data back to the humans, who still haven’t found a new suitable planet.

The humans live in a space station that moves around the galaxy to find a new planet, but still monitoring the earth if it will go back to its former glory. Some good came out of this disaster, the humans all see themselves as equals and need to work together to make food and other necessary things, to make the space station life work.

The humans left buildings, towers and other things behind, letting the trees, flowers, grass and other plants take over and making the planet green again. Water from the sewers came up from the ground and made small rivers or even lakes. Wines and threes started growing from the ground and buildings. There were a few animals that got to be with the humans to space, mostly farm cattle, like cows, pigs, sheep and house pets were also welcome

The weather and climate is really hot and damp, making lots of swamps. Lots of rain and fog covering most of the sky but underneath the planet is green and growing plants twice as fast.

The animal life became even richer, lots of exotic animals, birds and fishes, maybe even some new species. Animals from the old zoo’s and the forest got out and began to roam the old cities, making it the meeting places for all kind of different animals.

Project 5

Assignment

The assignment for this project was to make 25-35 second animation. a full body animations, without sound effects or dialogues, but music is fine. Only one stationary camera, no moving cameras or cuts. Only one character is allowed and assets by you or others are allowed (as long as you credit the creator). A simple, basic lighting and render the movie. The intro must contain the noroff logo. The outro must contain your name and course.

There where 3 briefs we could choose from, I decided to choose nr1:

A character comes into shot or is already in the shot. He/she faces a challenge and a situation unfolds. Show a buildup of emotion/physical intensity as they attempt to solve the problem. Either the character overcomes the challenge or does not.

schedule:

-Mon 09:00-16:00: holiday

-Tue 09:00-16:00: brainstorming, idea dev

-Wed 09:00-16:00: idea dev

-Thu 09:00-17:00: reference

-Fri 10:00-17:00: reference

-Mon 09:00-17:00: blocking

-Tue 09:00-18:00: blocking

-Wed 09:00-16:00: blocking

-Thu 09:00-16:00: corrections, going into spline

-Fri 09:00-16:00: corrections

-Mon 09:00-16:00: refining

-Tue 09:00-16:00: refining

-Wed 09:00-16:00: corrections

-Thu 09:00-17:00: finalling, rendering, report

-Fri 10:00-17:00: finalling, rendering, report

Idea development and research

I had a hard time coming up with an idea for this, at first I thought of going for one of the other briefs that had the scenario, but I didn’t feel like animating them. So I came up with this little kid out picking some peaches, when he gets a glimt of the biggest peach he has ever seen and decided to get it. He would stretch to get it, jump and even climb. But he would fall and the giant peach would fall and hit him.

I was sick these weeks so I had my friend Erik to act out my references.

Execution

I started by drawing some thumbnails to the animation and to Erik to act out, but photoshop crashed and I lost the thumbnails, but this was after we had filmed the reference, so no harm was done. When I got the reference I started modelling some assets, the tree took a little bit of time, just normal cylinder and extrusions, the peaches are smoothed squares that I modelled to be a little more heart shaped and with the stems. The box is just a box extruded inward to make a hole for the peaches. Everything is UV unwrapped so I could texture it, but in the end I didn’t get time to do so.

When I got all the assets done I could start blocking. I used two days to block out the main poses and used the last blocking day to block in some breakdowns and in-betweens. After I got feedback I fixed some poses and facial expressions. I used a day to fix stuff and then I placed everything into auto spline and fixed some small rotation problems.

When I got feedback on how it locked after I had splined it, I needed to fix some more breakdowns and in-betweens and more rotation errors on the hands. I did lots and lots of small changes and mostly hip, body and shoulder rotation changes. I didn’t get much time to do other changes before I had to render out the animation. I placed a directional light and a vray dome light to be the sun and the sky, since I didn’t have enough time.

Challenges

Animation in it self is a challenge for me, working with animation is time consuming and longer times it get a little boring for me. But there are so much I could have done better, like the hand poses, and the walking in the beginning, and the end could use a little work. If I had more time I would maybe animate the peaches in the box, since they are a little to static.

Self-evaluation

I think this was my best animation so far, and I’m happy I made it. I don’t think it would be this good if I choose the other briefs I didn’t have motivation to do. There are a lot of thinks im not happy with also, the hand poses, the walking right after the jump, the peaches in the box and the ending. If I go back to fix this another time, I would use more time on hands and face.

Render time:

643 frames, Every frame takes from 15-20 seconds to render.

video:

Portefolio 2

Portfolio 2
Assignment:
In this assignment we needed to create an online portfolio where we will present two video clips. Fp01 will be a 30-60 seconds long video showreel from the character design assignments (CD1-CC4)
Fp02 20-30 seconds long video showreel form character animation (CA2-CA6)
schedule:
-Mon 09:00-16:00: character fixing
-Tue 09:00-16:00: character fixing
-Wed 09:00-16:00: character rendering, animation
-Thu 09:00-16:00: rendering, animation
-Fri 09:00-16:00: animation, report

Execution:
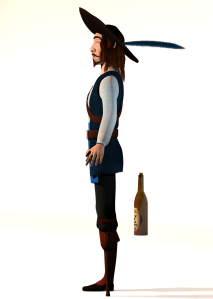
I started with fixing up the pirate character, fist of all I checked what I could do better in the feedback of it. Mostly it was just the lighting and shaders I needed to fix. The shadows on the background where way to strong, so instead of fixing all the lights I simply hid the background and comped just the character into the video, this also halved the render time. When I got this I started fixing up the speculars on the character, placing it in photoshop adding some lighting here and there and some colors. I also made a vray material for the textures and added the specular. Then I started to render.
the plan got showed a little longer forward since the renders took way more time than I thought. So on Thursday I worked on the animation, cleaning up the curves and adding some in-betweens. At this point I didn’t have much time so I needed to rush to fix the animations.
I fixed the falling, some hand poses and the head movement on the pushing animation.
On the cycling animation, I didn’t have much time to fix before I had to hand in so I fixed some hip movement and some head movement.
I didn’t use much time in premier since I didn’t have time, so I made some easy background and text, and found a song and placed them together. Song: TheFatRat – Unity
Challenges:
Some challenges was the renders time, it took up so much time.
Self-evaluation:
If I had enugh time I would use more time on the animation, and try to fix more in the graph editor. Knowing now to set the timeplan after I know how long time the renders would take. I would use more time on the video itself, right now the push animation is really bad put together and pixelated.

Songlink: https://www.youtube.com/watch?v=CzCjMbYZWN8

Project 4: character creation

Assignment

Design and create your own character in 3D. present it in a professionally render, with research, design process like character template, consept, silhouettes, turnaround, tone and color maps.

The character had to be bipedal humanoid, with fingers, opposable thumbs, face with a nose and edge loops around eyes and mouth. Functional design and final delivered character must be optimized for rigging/animation.

The character must be UV unwrapped and textured, not pre-made shaders.

schedule:

-Mon 09:00-16:00: brainstorming, idea dev, template, siluets,moodboard

-Tue 09:00-16:00: value/tone patterns, color schemes, texture moodboard

-Wed 09:00-16:00: time for more dev, turnaround

-Thu 09:00-17:00: modeling

-Fri 10:00-17:00: modeling

-Mon 09:00-17:00: modeling, texturing

-Tue 09:00-18:00: texture

-Wed 09:00-16:00: texture, lighting

-Thu 09:00-16:00: lighting, rendering, report

-Fri 09:00-16:00: rendering report

Idea development and research

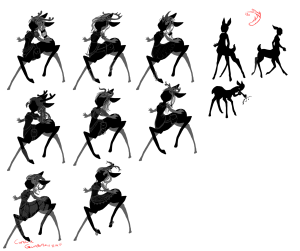
I had many ideas to what I could make, knight, Templars, fox barbarian, giant monster, mermaid, goddess, centaur and others. I was really liking the idea of a mermaid character, but since the assignment said that it had to be a bipedal humanoid I had to scratch that idea. I decided to go for a kind of monster creature with giant arms and small back legs walking on its knuckles. Or a deer/doe centaur.
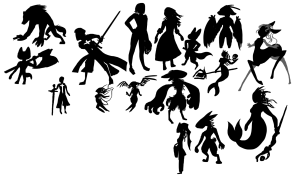
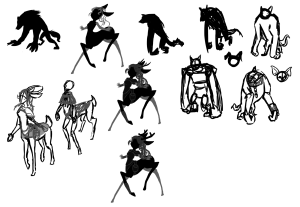
2015-24-04_P4_Caroline-Gundersen_ID012015-24-04_P4_Caroline-Gundersen_ID02

But I decided to go for the centaur after some talking with my teacher. I looked around on google for ideas for my centaur, if I was going to make it a deer or a horse.
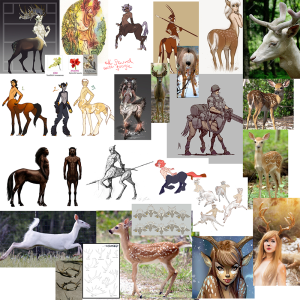
2015-24-04_P4_Caroline-Gundersen_ID03

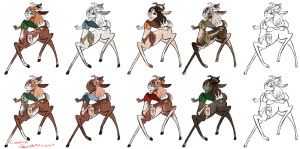
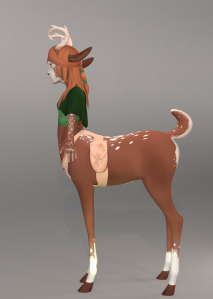
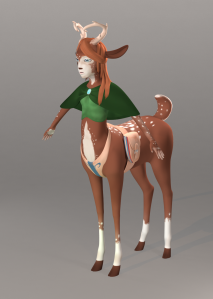
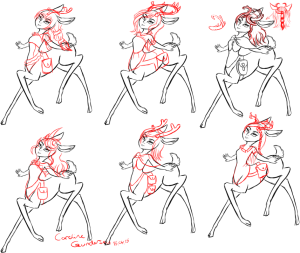
In the end, I went for my deer design. I used my original silhouette and used different tones of grey to make the clothing. I came up whit the story as I drew different clothing, like a kind of deer princess, a deer magician (gypsy), armoured or a deer farmer. I went for the simplistic farmer idea, shes a farmer living on the outskirts of a enchanted forest, living of the land and helping people/creatures passing by. (the middle design with another set of horns and hair)
2015-24-04_P4_Caroline-Gundersen_ID082015-24-04_P4_Caroline-Gundersen_ID09

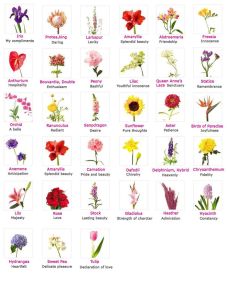
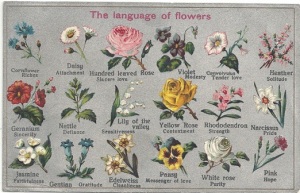
Since I thought of her as a farmer I wanted a flower name. so I searched for flower meaning on google and found some flower names I liked. I went for Lilac Aryllis Edelweiss, which is youthful innocence, splendid beauty and cleanliness. Cause she’s young, innocent with a good heart, no corruption and beauty.
2015-24-04_P4_Caroline-Gundersen_ID052015-24-04_P4_Caroline-Gundersen_ID04

2015-24-04_P4_Caroline-Gundersen_ID10

After I got the name, story, and general design done, I started making some colour samples. I took different kind of deer and used mostly their colures, all from little deer fawns to reindeers. The clothing I wanted to be a natural colours. The belt I used my Sápmi belt as reference, the colours and pattern. (picture of my Sápmi belt)
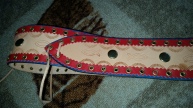
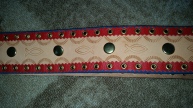
20150421_165921 20150421_165842

2015-24-04_P4_Caroline-Gundersen_ID11

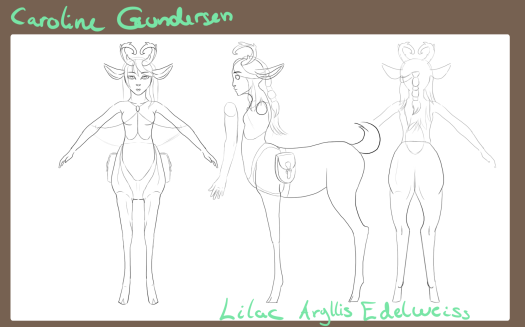
When I got all of the design done I drew a turnaround. Using pictures of deers to get the front, side and back view right. since I want a more cartoony style I used the movie Bambi as a reference for the deer body.

Execution

After I got the turnaround I imported it into maya as an image plain, I did so three times for the front, side and back side. I stared with the deer body. I made a cylinder for the general shape of the belly and the back, deleting the top, bottom and the one side and moving the verts. I used a basic cylinder for the bottom part of the legs as well, but not connecting them since I still needed to make the shoulders. I used quad draw to draw out on the image plain where I wanted the quads to go, and moved them out and formed into place. I used mostly quad draw and moving the verts into place. I used a picture of a deers edge flow from David, to map out the general edge flow of the deer, excluding the head.
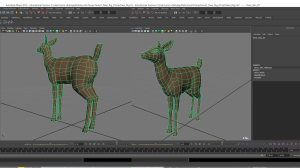
2015-24-04_P4_Caroline-Gundersen_ID07 (picture from David)

I used the picture mostly for the shoulders and butt. The legs I made more detailed and not so round. The tail I made more puffy and made more or less the same kind of ears as the picture. I used other pictures and videos how to make human shoulders and body. I made a quick make shift head shape and smoothed it two times, so I could make it live and quad draw right on top of that, instead of moving the vert out, it would be too much work. I used a curve to extrude the horns out and extruded out the extra horns parts. The hands I made from a cylinder and some boxes for the fingers, adding details with more edges and quad solving the hand palms.
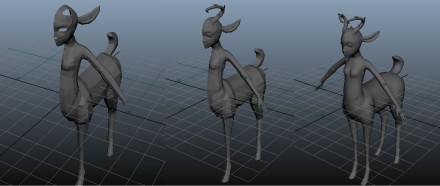
modeling prosess

When I was done with mostly all the parts I started combining them and merging them together, adding or removing edges if needed. When everything was attached I started working on mirroring it.

The eyes are spheres with extra edges on one side to make the pupil go inward and an extra sphere on each eye to make the glossy effect. The hair I made by making the head live and drawing plains on the head to make the hair.

The clothing and belt was easy, I duplicated the body mesh and made the clothing after that and removing faces I didn’t need. Re-sizing them a little so they would go on top of the body mesh and extruding an edge inward toward the mesh. The bags I made with quad draw making one side and duplicating it, forming the sides and the turnaround and merging them together to make the basic bag. Doing the same for the top of the bag, merging it with the rest and folding it over the bag. Using quad draw to make the strap that would hold it closed and making a buckle to make it more believable. The poncho was a little tricky, but I made the body live and quad drew on the front to make it fold on the breasts, I also added some quads on the back and shoulders down the arm so I could extrude to the front and back to make the basic shape. Adding more loops to form it more naturally. Extruding inward to make the inside of the poncho. The small details like the hairpin and bands on the back head I used quad draw to make the pin and used mostly cylinders and forming them to the hairbands. The little gem on the front I used a cube, formed, and extruded the rectangular shape outward.
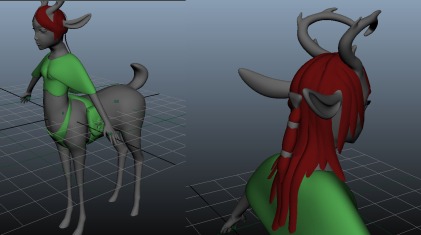
modeling prosess2

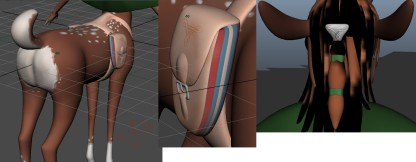
Later I unwrapped the whole model, planar mapping it and cutting where I wanted the borders. All the clothing on one UV map, body on one and the hair on one. On the hair, there was more than one with the same kind of UVs so I placed them on top of each other to make it easier. (Hair, clothing and body UVs)
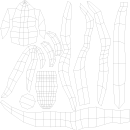
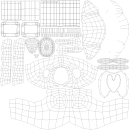
2015-24-04_P4_Caroline-Gundersen_FP09 2015-24-04_P4_Caroline-Gundersen_FP10 2015-24-04_P4_Caroline-Gundersen_FP11

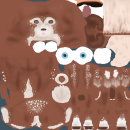
Since I wanted a cartoony look on it I thought to have some details but not to detailed, I still wanted it to be simplistic. First, I drew the body with a more detailed spotted pattern, it was how I drew it in the colour patters, but I saw it didn’t work out so well. It stole all the attention from the rest, so I reworked it to a more simple design with a little darker colour and another more transparent colour as a transition from the whitish colour to the brown. I used that design on the rest of the body. For it not to look to simple I added some colour variation in the base colours of everything. I added some additional texture to the clothing, some leather texture and linen texture just to overlay what I had to make it look more like leather and cloth.

I added a king of “family” symbol or something like that on the bags and her hairpin. I also added two little swirls on the front of the belt, since it was just a blue stripe there and looked a little too boring.

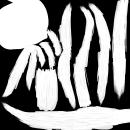
When I was almost done with the textures I started working on the alpha maps for the hair and eyelashes, painting white on the parts I want to see and black where I don’t want to see anything. I also took the poncho into Mudbox, sculpted a high-res model, and used it to make a normal map in Maya. Removing the bits I didn’t want on the map with the basic colour on the normal map.
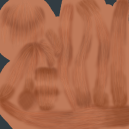
hairclothing1body

hair alphabody alpha

texturing prosses

(legacy viewport render messing up the hair texture on picture3)

The lighting I went for was a studio set up, with one key light, several fill lights and rim lights. All of the lights have a more yellowish or orange colour so it would look more natural, and one green light to shine some green on the legs and up. I have one key light without decay to light up the scene, and several fill lights to fill out the shadows on the character. The rim lights are to lighten up the back and add a glow behind the character.

Challenges

I had some challenges where Maya crashed. In the start I made the body, forgot to save and Maya crashed. But I think it went really well after that, I made the body twice as fast and it looked much better, so I think it was good that Maya crashed on me. Some other smaller times where Maya crashed right after I saved, but it didn’t do anything since I already saved.

The connection between the tail and the butt and back of the deer was really challenging, I had forgotten to add one more edge, so when I realised that it went smooth. It was hard to draw on the connection on the feet and belly, since it was there I put the seams, so I used some extra time to fix it.

Self-evaluation

In the end I think the product turned out great, I am really pleased with the result. I especially like how the horns turned out in the end. I had so many ideas for the horns, but I am glad I choose the ones I did. They are simple, jet beautiful the way they curl.

Render time:

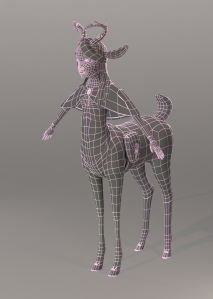
-Full body, Smooth clay with lowpoly wire (3/4): 3min

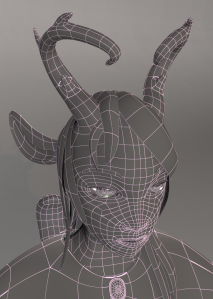
-Close-up of the face Smooth clay with lowpoly wire (3/4): 5min

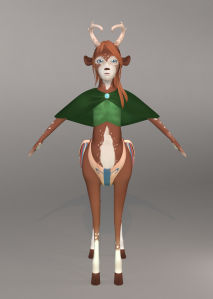
-Smooth with texture (Front): 3min

-Smooth with texture (Side): 4min

-Smooth with texture (3/4): 3min

-Checker (3/4): 3min

Final product
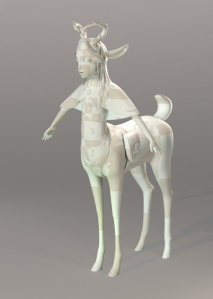
2015-24-04_P4_Caroline-Gundersen_FP06 2015-24-04_P4_Caroline-Gundersen_FP012015-24-04_P4_Caroline-Gundersen_FP02 2015-24-04_P4_Caroline-Gundersen_FP032015-24-04_P4_Caroline-Gundersen_FP042015-24-04_P4_Caroline-Gundersen_FP05

character rigging

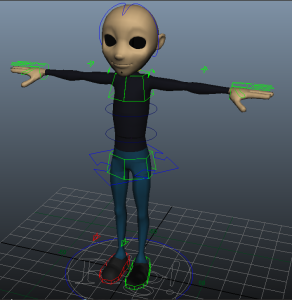
This week we where to rig a supplied character. Adding control objects for joints/bones. Setting up IK chains for atleast the feet, create a foot roll system and naming every aspect of the rig correctly.
schedule:

-Mon, 09:00-16:00, legs and feet
-Tue, 09:00-16:00, torso and head

-Thu, 09:00-16:00, arms

-Fri, 09:00-16:00, finishing, fixing problems, checking for wrong naming

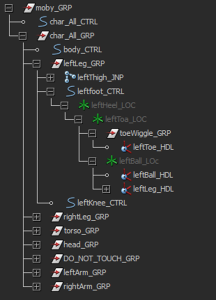
The first day we did the legs. Started by making five joints (with the last one) in the side view, to make the legs. leftThigh_JNT, leftShin_JNT, leftFoot_JNT, leftBall_JNT, leftToe_JNT and the same for rightLeg. Parented the respective proxy GEO bits so the respective joints.
By making a PR IK solver from the thigh to the foot and a pole vector, from the knee controller to the leg handle. After that I made some SC IK handles from the foot joint to the ball and toe joints. I made three locators for the heel, ball and toe. Placing the ball and toe to the joints, and placing the heel to the heel of the mesh.

outliner

By parenting the ball and toe locators and handles under the heel, I can make heel, ball and toe lift. Creating some extra attributes for the foot controller and opening the connection editor. The controller on the left and the locators on the right. by clicking the rotate x attribute on the locators to the respective attributes on the controller.

After this locking and hiding the attributes that aren’t needed, and making sure it’s named correctly.

For the torso I made a straight spine chain with 7 joints in total (with the end joint) in the side view. By doing this the rotations of the joint should be the same. If not I could use orient joint tool to fix the rotation axis. By duplicating the chain and deleting all but the top and the bottom joints, naming them shoulder bind and hip bind joints. By making and IK spine between spine one and seven jont, this gives us a handle, effector and a curve. By skinning the curve between the two joints (shoulder and hip) we can move the joint to move around the curve. By making some controllers and parent constrain them, i can move the controllers to move the curve but not rotate, so I used the advanced IK twist control found in the attribute editor.

By making a FK spine I can constrain It to the IK spine to force the IK system to bend around the FK joints pivots. By making some curves and using the command ‘parent –s –r’ to make the curve shapes the new joints.

Adding a body control and parent contraining the torso group, and unticking the inherit transform of the curve.

The head I made five joints, neck and head. By orient constraining the head controller to the head joints so it does not inherit the neck rotations, and orient constraining the neck controller to the neck joint. By making a group with the neck controller and neck joint I can constrain the group to the spine7 joint.

Starting on the arm, making three joints at first but adding two additional points in between the elbow and wrist joints. Adding jet another, the clavicle joint. Making an SC IK handle for the clavicle to the upperarm joint, we can use this to translate the shoulder up and down. After that creating an PR IK handle for the arm, but not from upper arm to wrist, but from upper arm to the joint right after the elbow joint, and moving the piviot of the effector to the wrist. And like the leg adding a pole vector to the elbow.

Making controllers for the shoulder, elbow and hand. To make the arm rotate with the hand controller I used expression editor with this expretion:

leftForeArm3_JNT.rotateX = leftHand_CTRL.rotateX*0.6

leftForeArm2_JNT.rotateX = leftHand_CTRL.rotateX*0.3

for both right and left arms. To make the arm move with the rest, do the same as I did on the neck, parent constrain a left arm group to the spine7.

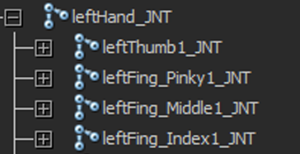
Making 21 joint for the hand, from a wrist joint to all the finger tips.

hand

Making sure the rotation of the fingers go in +Z by fixing the rotation order of the joint and rotating the thumb the right way. On the finger controls I added curl1, curl2, curl3, spread and twist attributes. Like the foot, I directly connected the finger rotation on the finger control.
Curl attributes rotating in Z, spread in Y and twist in X.
I skinned the hand geo to the joint to make it move with the joints. I pont constrained the hand joint to the wrist joint, but orient constrained the hand joint to the hand controller to make the hand controller to control the rotation.
I cleaned up all the attributes, locked and hid the ones not in use, added controllers and rig into different layers. Making do not touch groups, and making sure everything is named.

Challenges with this week was to understand why to parent something and constraining others and how to set up different expressions and attributes. But in the end it all worked out.

rig1

Character creation 4

this week we had to texture and render out some studio lighting renders.

schedule

-Mon, finding texture reference

Tue, prop

-Wed, face

-Thu, clothes

-Fri, finishing and rendering

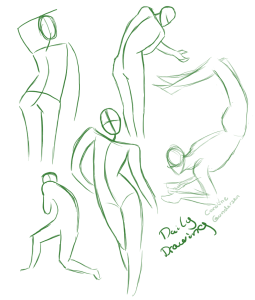
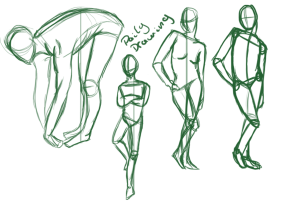
this weeks daily drawing was to draw some gestures, with the help from Proko’s videos on youtube (link at the end)

2015-20-03_CC4_Caroline-Gundersen_DR012015-20-03_CC4_Caroline-Gundersen_DR02

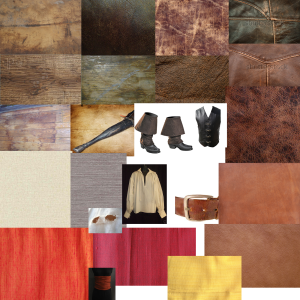
this week i started with finding out what materials the clothes, prop and the peg leg was. The clothes materials was basically going to be linen or other likely materials. using mostly simple materials and using the same materials. sweater and the pants was going to be basically the same, the belts, boot, hat, and vest going to be different kind of leather. the peg leg of coarse wood, and a silk belt.

used mostly leather, and normal material, a kind of worn and water damaged wood. by using a silk belt to show a class, a kind of higher class then the rest of the crew, since silk was a luxurious fabric.

2015-20-03_CC4_Caroline-Gundersen_ID02

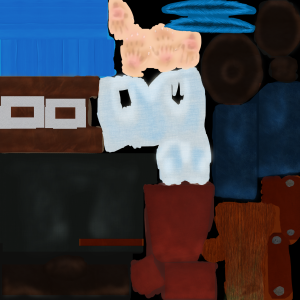
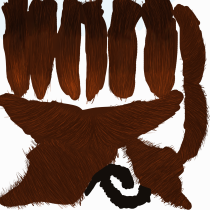
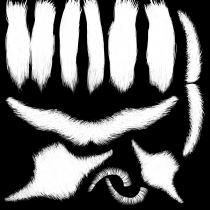
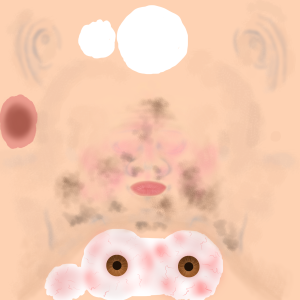
i used Photoshop to paint and mix in real textures. and drew some alphas to make some part transparent so i would get the feather and hair to look like they do. using mostly the brush tool to make it look worn in places like arm pits, elbows, knees and other places where it would wear out more than other places. adding variation in the skin, like from skin color, red, pink, yellow, brown and blue, to make some areas darker and red. since my character is a pirate who drinks so much, he would have a more red/pink skin and red eyes. Adding dirt to to the skin, like his not been washing, and maybe been fighting.

body

beard beard1

face

renders are all 1024×1440

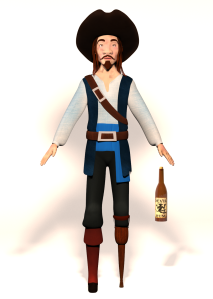
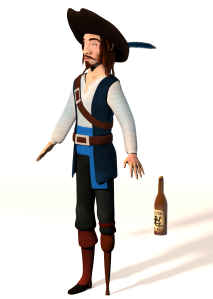
2015-20-03_CC4_Caroline-Gundersen_FP03 Front took 9 min to render

2015-20-03_CC4_Caroline-Gundersen_FP02 3quarter took 6 min to render

2015-20-03_CC4_Caroline-Gundersen_FP01 Side took 3 min to render

Links:

https://www.youtube.com/user/ProkoTV