compositing vehicle

this weeks assignment was to learn Nuke and use last weeks renderpasses to use in our composting.

-Mon, 14:00-16:00, learning nuke

-Tue, 14:00-16:00, placing the passes together

-Wed, 14:00-16:00, finishing

-Thu, 14:00-16:00, finishing

-Fri, 14:00-16:00, free

this week all we drew was some small thumbnails.

drawing compositing week

i started by plasing all the passes in nuke and merging (plus) all together except the background, background shadow and AO.

Untitled-1

the background is merged with and over, where all the foreground is over the background elements. after this i added the multimatt to use as a mask to get the stars to glow. i used shuffle, a blur and a glow to get the glow effect i wanted and i added it all in. i used some ramps and shuffle copies to blur the background on the right places.

and last i used a write node to render out the finishing product:

2014-10-30_C01_Caroline-Gundersen_FP01

Vehicle Lighting and rendering

this week we where going to light and render our vehicles, with different render passes. Lighting, specular,reflection, refraction, multi matte, alpha, Z depth, ambient occlusion and sample rate. also we where to make render layers, Ambient occlusion, foreground and background.

schedule

-Mon, 14:00-16:00, finding back ground and planing

-Tue, 14:00-16:00, background and passes

-Wed, 14:00-16:00, lighting

-Thu, 14:00-16:00, finishing

-Fri, 14:00-16:00, report

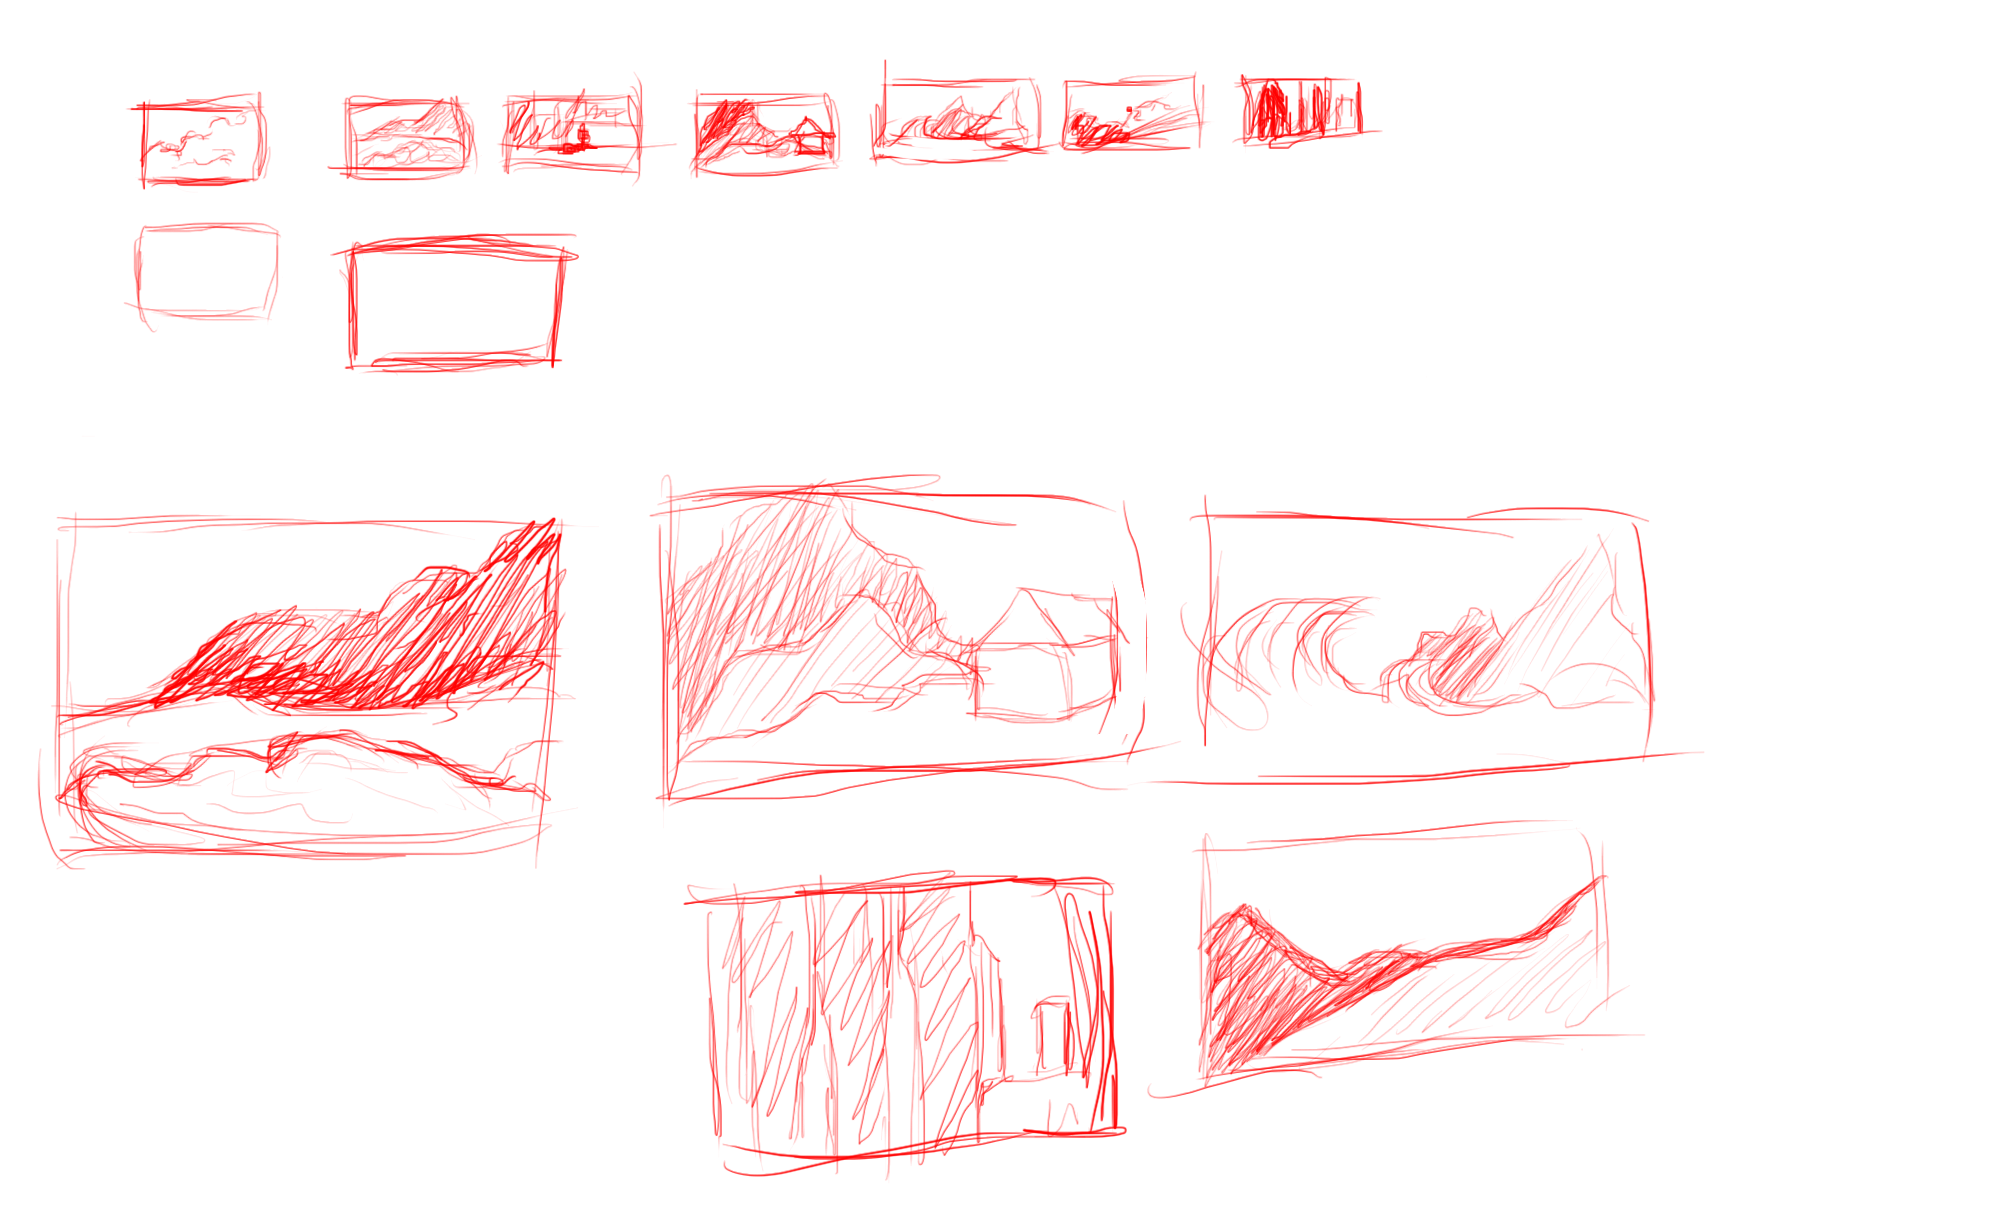
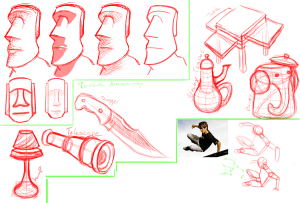
this weeks daily drawings was to draw a statue with what we learned last week, relation ships with straights and curves and tones. quick drawing, everyone came with things we could draw: dagger, telescope, lamp, basket, table and a strange looking teapot. the last was to draw a picture with simple shapes.

2014-10-23_LR3_Caroline-Gundersen_DR01

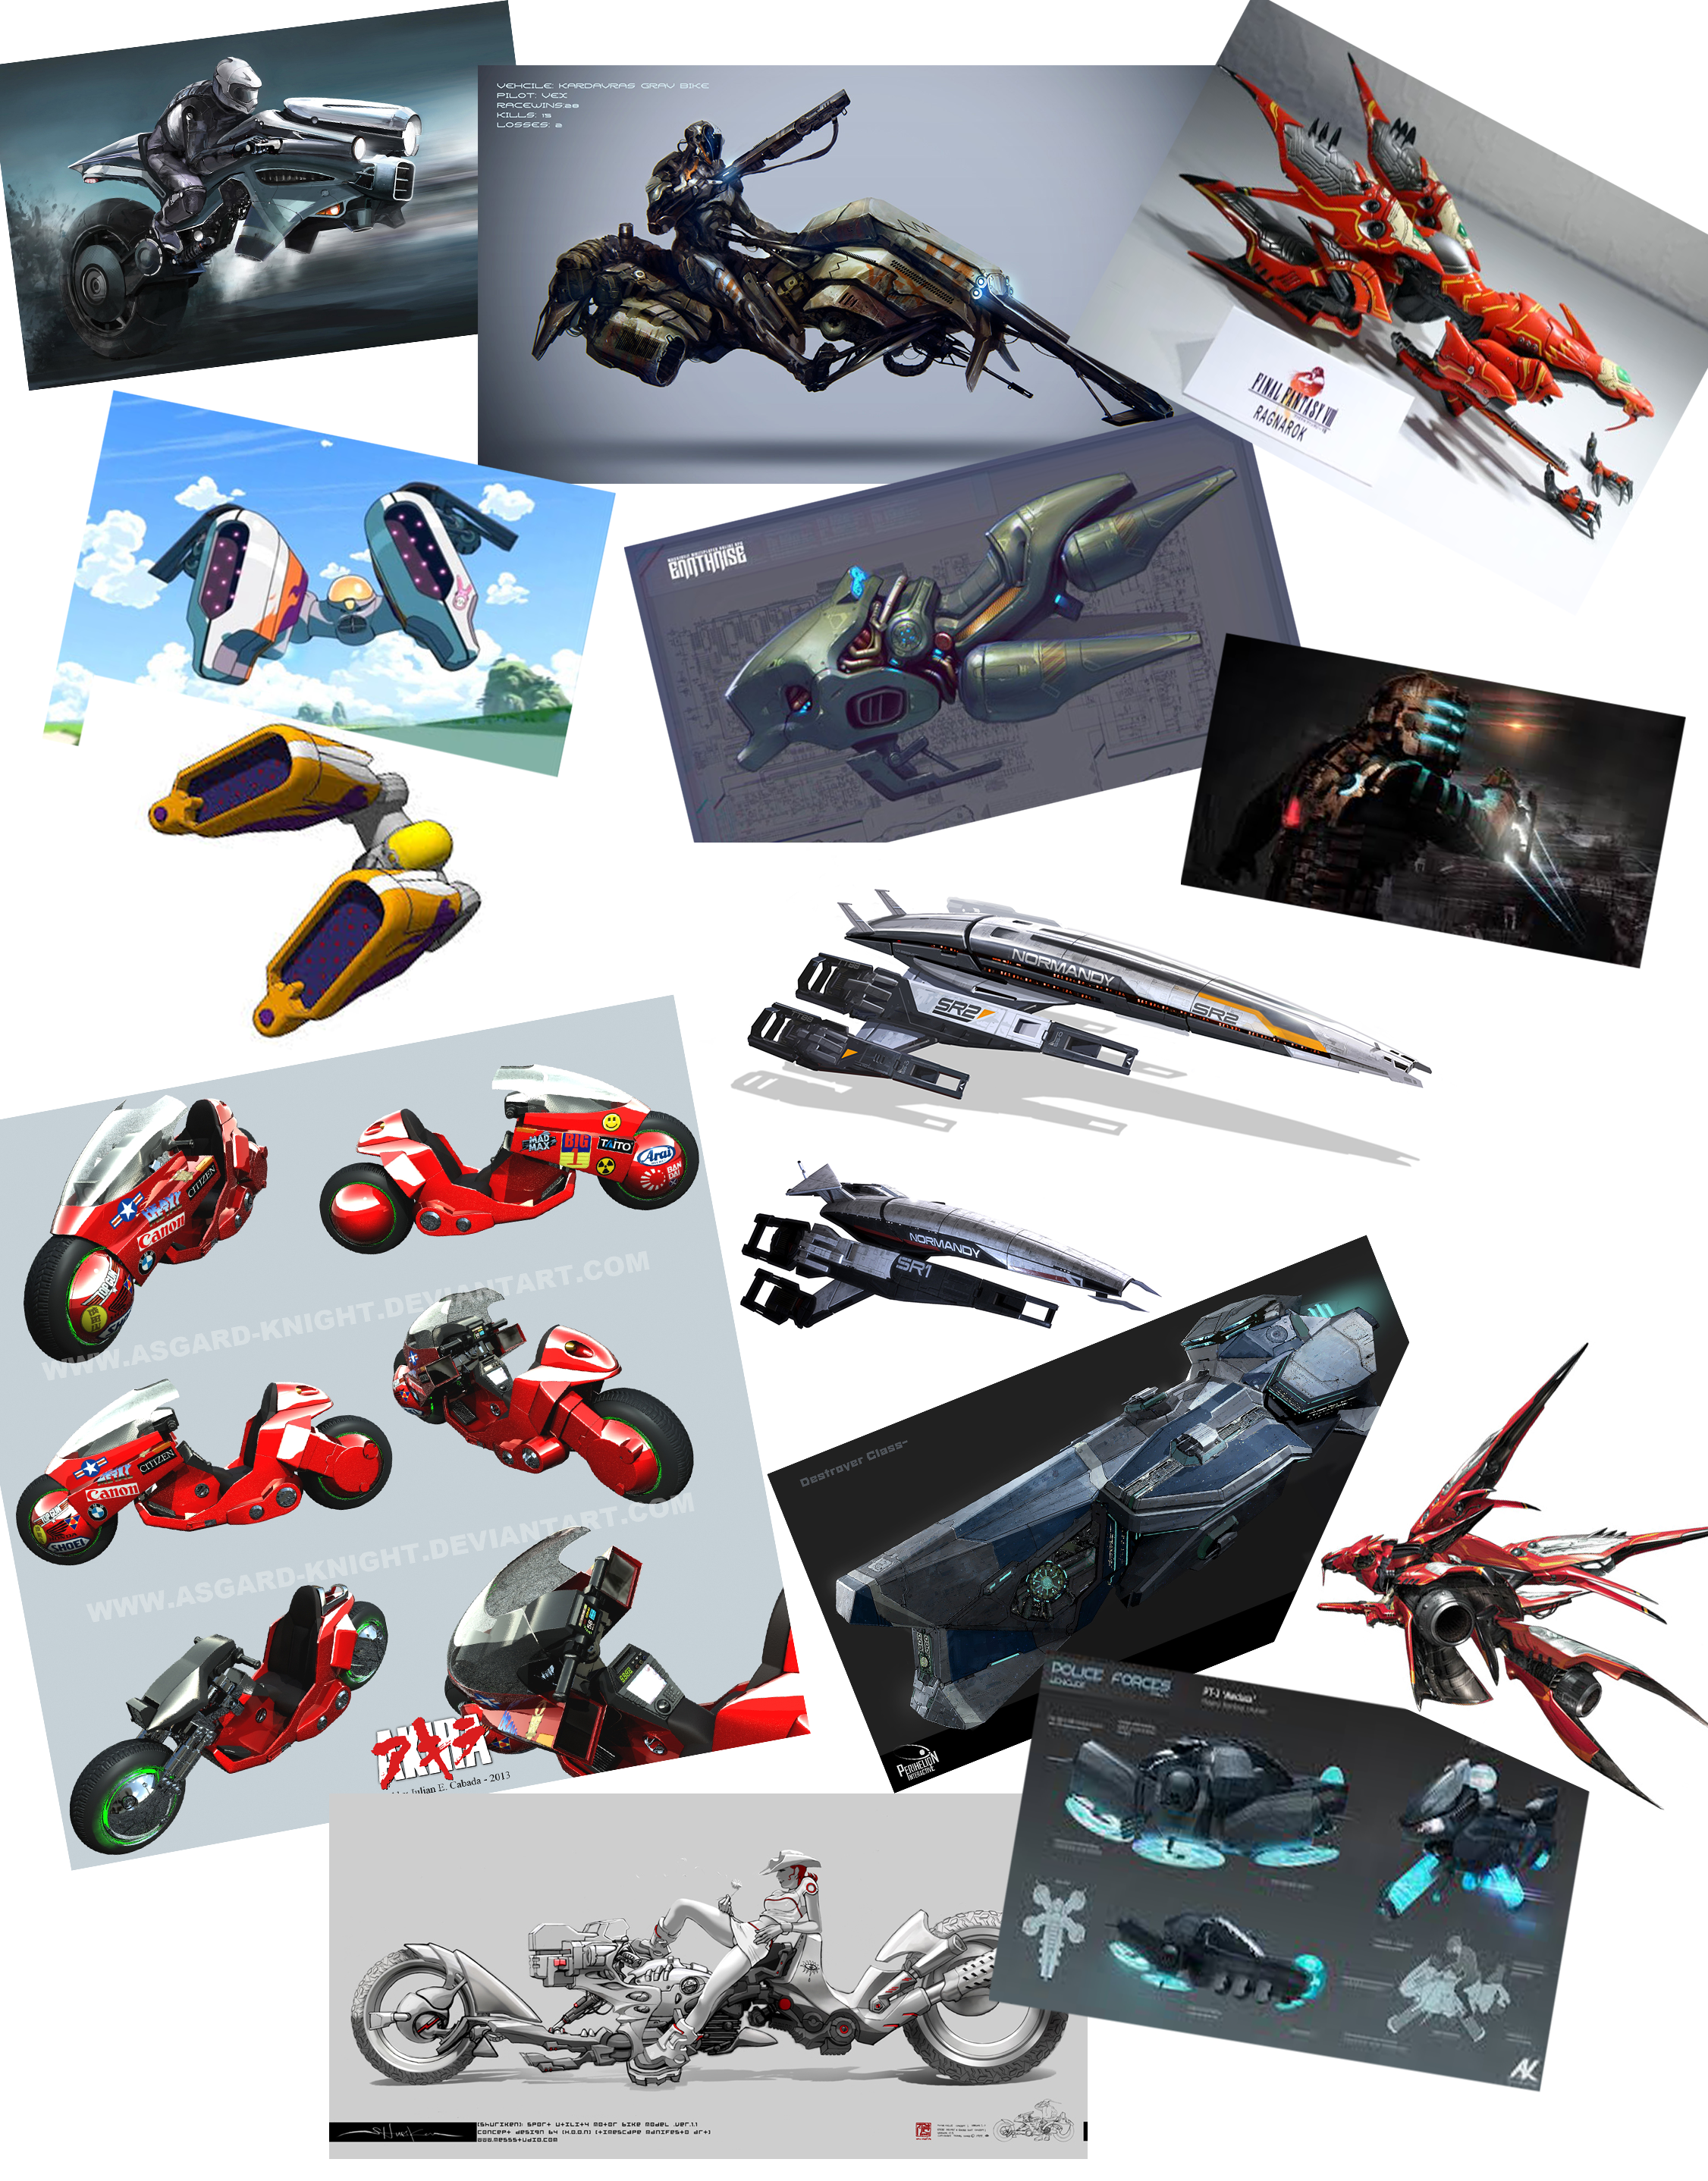
we learned more about how the render passes worked, render layers and how to add a vray environment. i set up the image i wanted to use for background and light reference.

new background

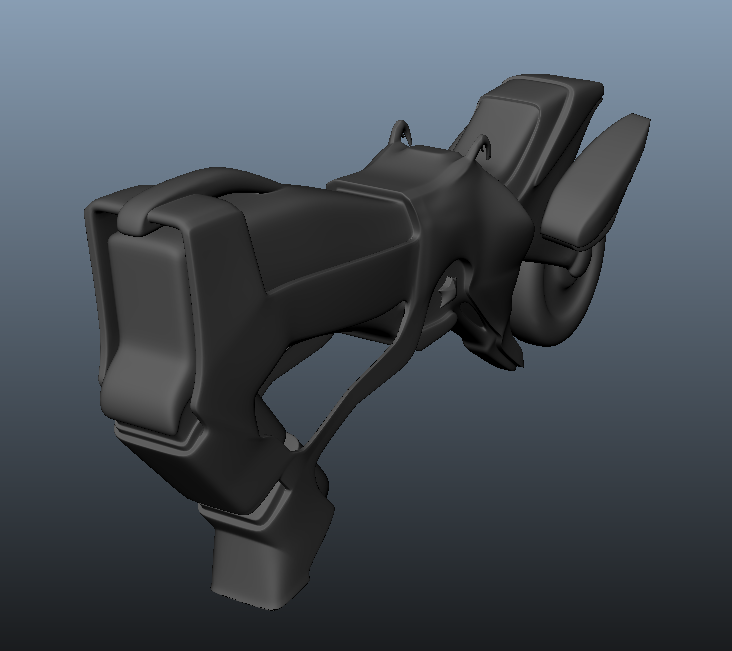
i placed the bike in the picture where i wanted it and added a plain so the shadow would show. i added the bike on foreground layer. i also added the lights inn so it would look natural with the background i choose. i added everything to the background layer and made it invisible, so it would cast a shadow but not show up in the renders. the AO, i made a new render layer and made a vray dirt and a surface shader overwrite to the layer to get the AO.

i had some problems with the Z-depth render pass. i couldn’t get the locators results to work with the Z-depth, but it all got fixed when i realized i had to add the result in centimeter and not in meter.

thanks to Renata that showed me how to do the Multi-Matte passes. adding a material ID to the material and number them. to then take the numbers in the multi-matte passes.

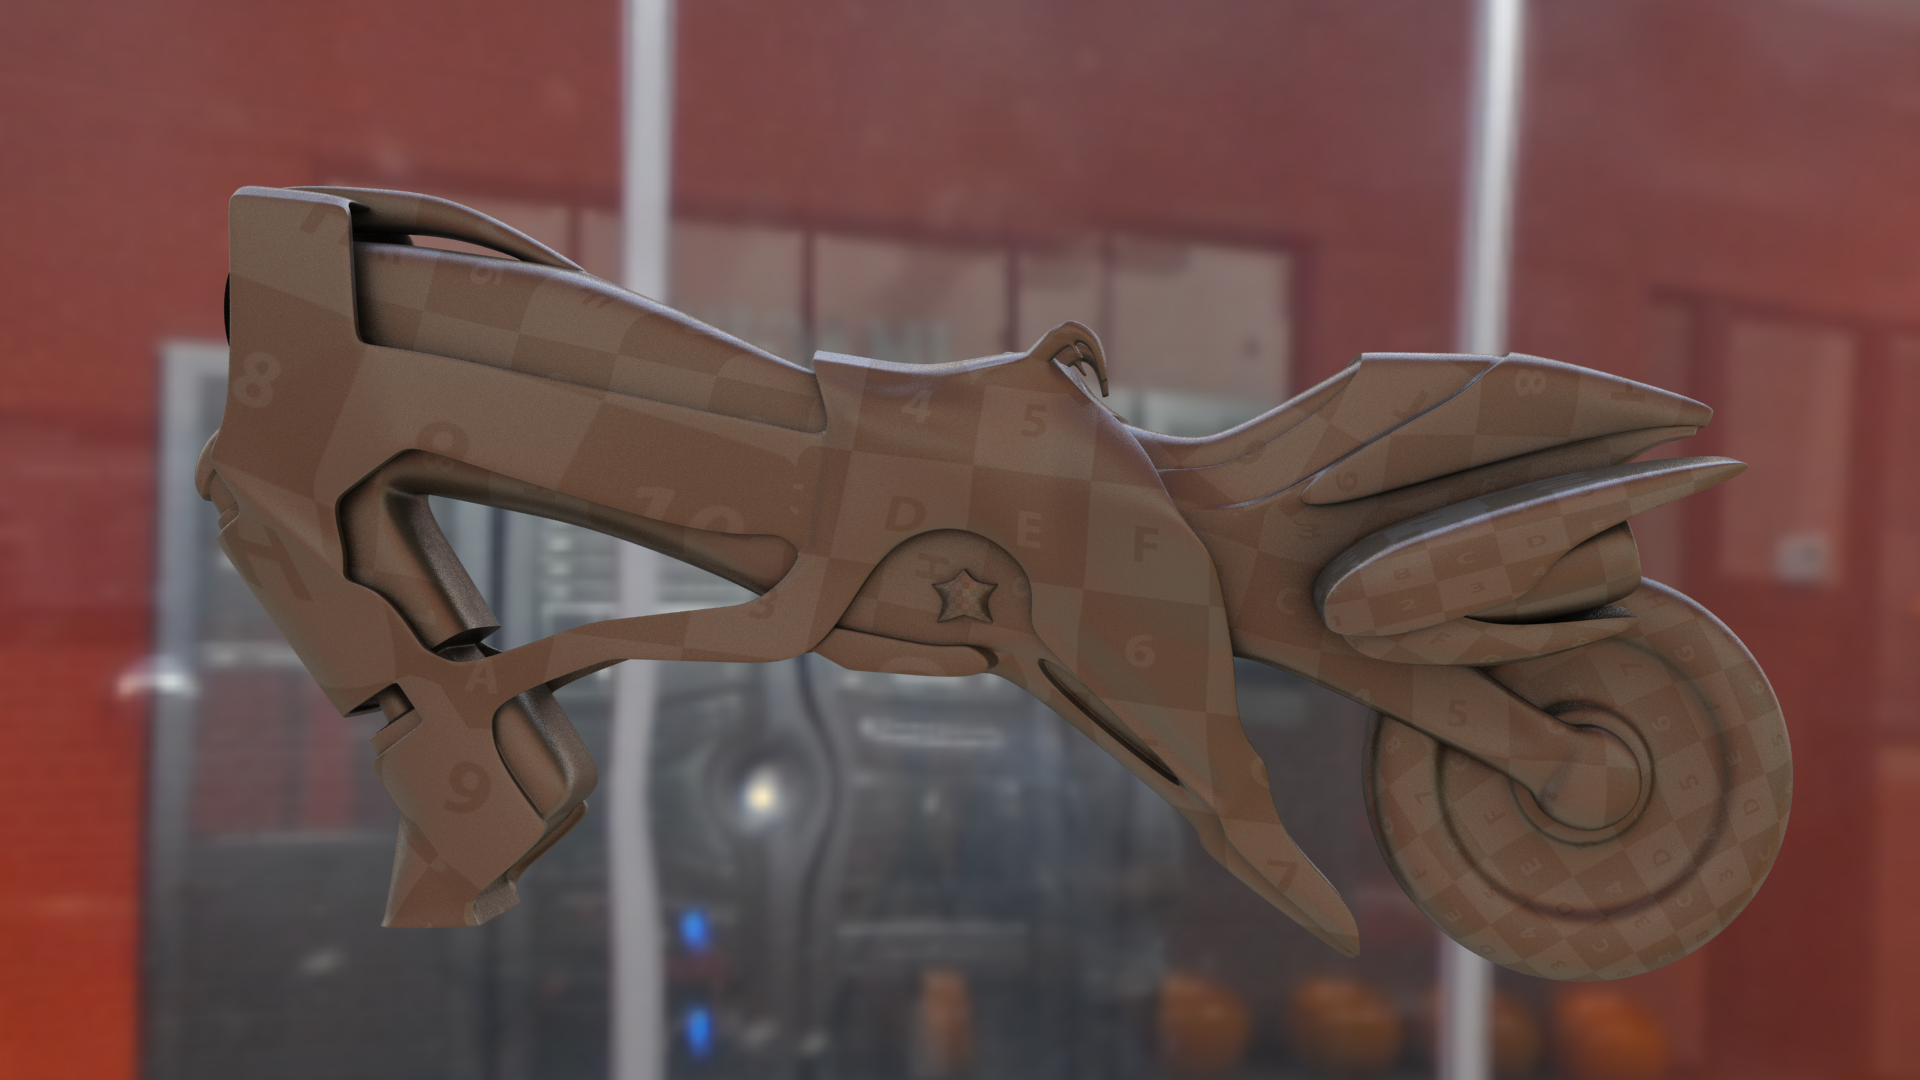
the materials to the bike was normal vray materials, i added some reflections and set the fresnel IOR to 5.983. this added a nice glossy, but not too glossy, metal look to the bike.

after i got the light, materials, layers and the passes it was time to batch render all to exr files.

Untitled-1 
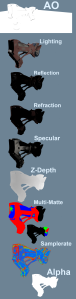
(a quick mash-up of all the different passes)

and a quick final render with everything and a quick paste in photoshop i made a preview on how it would look:

2014-10-23_LR3_Caroline-Gundersen_FP14

summary of challenges, the z-depth meter to centimeters and the multi-matte witch i got help from Renata.

i’m really pleased with how the passes, layers and materials turned out. i think i got the shadow right. and i was really pleased with how i got the metal, not to rugged and not too glossy, and the scratches are not as glossy as the rest and you can still see the different colors nicely. like its been through some races, scratched and crashed.  one down side its the really noticeable line on the front, with came clearer when i added the material.

Texturing Vehicle

this week we where going to fully unwrap and texture our sci fi or fantasy vehicle. we where not to rely heavily on procedural textures or car paint shader in vray. adding details on the vehicle like scratches and other weat and tear, nothing is flawless. adding both a fully texture version and a checker mapped version.

schedule

-Mon, 14:00-16:00, drawing

-Tue, 14:00-16:00, unwrapping

-Wed, 14:00-16:00, unwrapping

-Thu, 14:00-16:00, texturing

-Fri, 14:00-16:00, finishing/report

this weeks daily drawings was to draw and learn shapes, 3D objects, line and tone and relationships, like thick and thin lines.

2014-10-09_T3_Caroline-Gundersen_DR01 2014-10-09_T3_Caroline-Gundersen_DR02

i already had an idea what i wanted my vehicle to look like, but i drew other colors differences too:

2014-10-17_T3_Caroline-Gundersen_ID02

but in the end i went with my first pick the, top pink one.

2014-10-09_M3_Caroline-Gundersen_ID01

it has some smaller details that was a little tricky to make, but thanks to the pen tool in photoshop i was able to make the blue and pink lines that flows through the bike. to the rest i placed the pink color and added a metal overlay to get a metal like texture on the pink. i changed from photoshop to mudbox several times, to get the dirt, scratches and burn marks better. i used a normal map to get some bumbs to go inward, i drew it in photoshop and imported it into crazybump to make it into a normal map. the holographic star at the front was easy, i took a plane and drew a star and a circle on it to get the diffuse color and then i made it black and white to add into opacity, so the black parts would be transparent. the specular maps i made was to make some parts more glossy than others, like the scratches was not going to be as glossy.

Render sice:  1920 x 1080, render time on all pictures: 5 minutes

2014-10-09_T3_Caroline-Gundersen_FP01 2014-10-09_T3_Caroline-Gundersen_FP02 2014-10-09_T3_Caroline-Gundersen_FP03 2014-10-09_T3_Caroline-Gundersen_FP04

i added a dome light with a picture on just to get the scene lighten up and to get some reflections. and too see if the reflections worked.

some challanges i faced was the textures that didn’t look right when i smoothed the object but we resolved it by separating some objects. i also used a little time on the render cause vray didn’t work so well when i was starting rendering, and it wouldn’t change render view.

i am some what pleased with the textures, but i feel i need to redo them later to get the outcome i really wanted.

Vehicle

this week we where to design and model a sci fi or fantasy vehicle. the vehicle is to be used as transport. no boundaries to what we make, just not a car or plane that actually exist. it had to be designed by yourself.

schedule

-Mon, 14:00-16:00, planing, drawing

-Tue, 14:00-16:00, starting modeling

-Wed, 14:00-16:00, modeling

-Thu, 14:00-16:00, finishing

-Fri, 14:00-16:00, finishing/report

this weeks daily tasks was to draw heads, using circles and specific lines. hair line, brow line, nose line and the chin.

2014-10-09_M3_Caroline-Gundersen_DR01

my ideas for the vehicle was a hover bike or a submarine. i had different ideas for the hover bike and the submarine. dut in the end i used the hover bike idea and didn’t draw the submarine at all. my ideas came from different kind of space ships and other pictures of futuristic bikes, but i also got ideas from a little old tv series “Oban star racer”. witch has all kinds of different cool designs on racer space ships.

2014-10-09_M3_Caroline-Gundersen_ID03

my first design was:

2014-10-09_M3_Caroline-Gundersen_ID04

but i didn’t like the seat so i changed it to another more sports bike seat.

2014-10-09_M3_Caroline-Gundersen_ID02

the idea was that it would have a hover part at the front that keeps it up when it drives, and rockets that gives it speed. but in order for it to stand when the hover part is off i added a little stand on the end of the front so it could stand still when it was turned off.

i started modeling the white and the pink parts (as seen above) for them self. but in my design some parts where to merge together, so i scratched my idea to make the pink parts for them selves and extruded some parts out from the base. i took some parts from the earlier design too, i merged the parts that was not suppose to be connected to the base, like the part on top where there is a ridge that goes over on the other side and connects.

2014-10-09_M3_Caroline-Gundersen_FP02 2014-10-09_M3_Caroline-Gundersen_FP052014-10-09_M3_Caroline-Gundersen_FP012014-10-09_M3_Caroline-Gundersen_FP042014-10-09_M3_Caroline-Gundersen_FP03  2014-10-09_M3_Caroline-Gundersen_FP06

some challenges was N-gons, i didn’t get many but there was some little ones all the way on the back, but thanks to Andreas that helped me solve them fast and easy. to model the little star on the side was also a challenge cause i couldn’t get the shape i really wanted.

i really like the outcome of this idea. i’m really pleased with how it turned out in the end, all from the shape of the bike, to the little details like the star.